Showing posts with label holidays. Show all posts

Wednesday, April 20, 2011

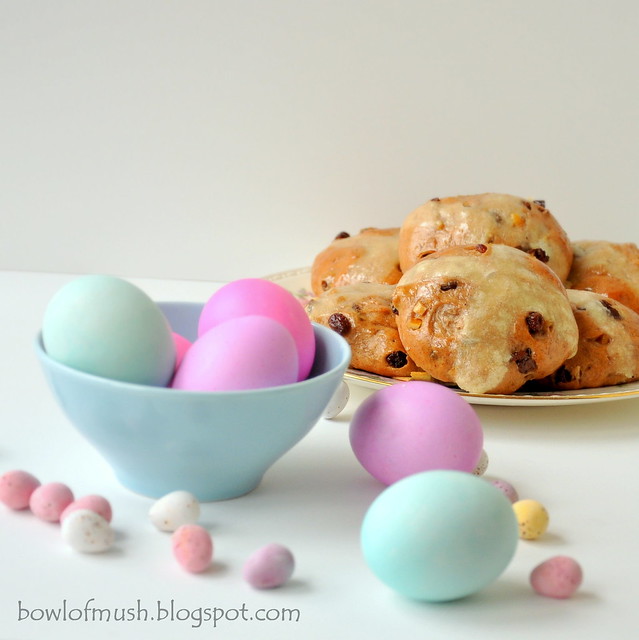
HOT CROSS BUNS


One ha' penny, two ha' penny – hot cross buns!


Easter is late this year and it certainly feels like it. Normally my birthday is right around Easter and it has always been more of joint celebration with birthday cake, Easter eggs and eating my body weight in chocolate.

This is the first year I decided to make hot cross buns instead of buying them. It's hard to find the real deal here in the States, all the hot cross buns seem to be more like sticky buns with icing rather than tea cakes. In the UK, they are sold everywhere as "tea cakes" until Easter approaches, when a cross is stamped on them and they become hot cross buns. I love them for breakfast, cut in half, toasted and smothered in butter with a cup of Miller Harris Thé Pétales.

I found this hot cross bun recipe in a book I have from Betty's Cafe & Tea Rooms in Yorkshire, UK. It's a lovely book full of seasonal recipes and desserts from their cafe's. I'm sure there's plenty of posts to come from this book.
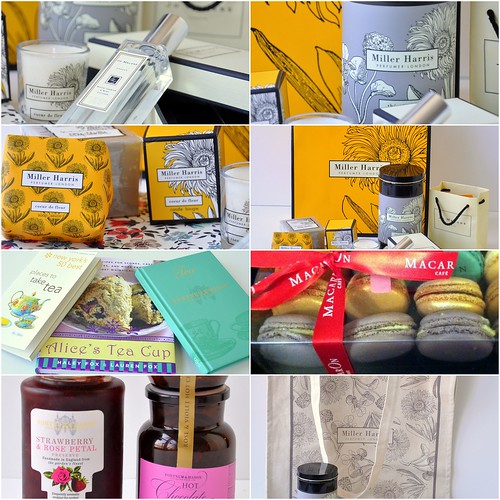

Some of my beautiful birthday presents from this year. Some Miller Harris goodies, Fortnum & Mason delights, one of my favorite Jo Malone Scents, Liberty of London, Macarons and Books.


Bettys Tea Rooms Hot Cross Buns:
(A Year of Family Recipes by Lesley Wild, Bettys Cookery School)

(makes 12)

For the crossing paste:

  • 180g (3/4 cup) strong white flour/bread flour
  • Pinch of salt
  • Pinch of baking powder
  • 50ml (3 tbsp) vegetable oil
  • 200ml (3/4 cup + 2 tbsp) water
For the buns:
  • 400g (1 1/2 cups + 3 tbsp) strong white flour/bread flour
  • 1 level tsp salt
  • 60g (1/4 cup) fine white sugar
  • 2 heaped teaspoons mixed spice (I used pumpkin pie spice)
  • 45g (3 tbsp) butter (cut into small cubes)
  • 50g (1/4 cup) fresh yeast OR 25g (2 tbsp) dried yeast
  • 130ml (1/2 cup + 1 tbsp) tepid water
  • 70ml (1/4 cup + 1 tbsp) milk
  • 100g (1/4 cup +2 tbsp) currants
  • 115g (1/2 cup) sultanas
  • 50g (2 tbsp) chopped mixed peel
For the sugar-syrup glaze:
  • 200g (3/4 cup + 1 tbsp) fine white sugar
  • 200ml (3/4 cup + 2 tbsp) water
You will need to make the crossing paste a couple of hours before it is required to allow it to relax before piping.

Sieve the flour, salt and baking powder together in a bowl.

Then add the vegetable oil. Mix together until a crumb-like texture has formed.

Add the water slowly while beating until a smooth paste has formed. Once you've added all of the water, beat the paste for a couple of minutes.


Cover the bowl with cling wrap and place in the fridge (make sure it's quite thick, mine was far too thin).
In a large mixing bowl, add the flour, salt, sugar and mixed spice.

Add the butter and rub the flour and butter together with your fingers until the mixture resembles fine breadcrumbs.


In a small bowl dissolve the yeast with the tepid water.

Make a well in the center of the flour mixture and add the dissolved yeast and the milk.

Begin to mix it all together and then begin to knead the dough for 10-12 minutes (or use your kitchen aid on speed level 2).


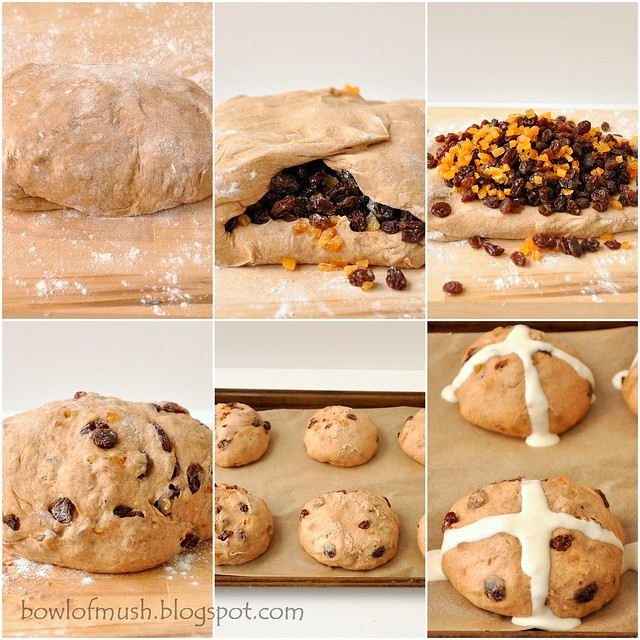
After kneading, spread the the dough on a floured work surface and pile all the dried fruit in the center.

Fold the outside edges around the fruit and continue to knead gently until the fruit is evenly distributed (be patient).

Allow the dough to rest on the work surface for 5 minutes covered with a tea towel.


Divide the dough into 12 equal portions and shape into round balls.

Line two baking sheets with parchment paper. Carefully place the buns on the baking sheets with plenty of space in between.

Cover with a damp tea towel and leave to rise in a warm place for 1-2 hours, until the buns have doubled in size.


When the buns have risen, preheat the oven to 200C/390F.

Prepare the sugar syrup by heating the sugar and water together until the mixture becomes syrupy. Allow to cool.

Pipe the crossing paste over the buns. Bake the buns in the oven for 10-12 minutes until they are rich and golden brown.


Remove from the oven and immediately brush the tops of the buns with the sugar-syrup glaze.

Allow the buns to cool on a rack. Serve warm or toasted with butter and tea.


 To see what else I'm up to, follow me on Twitter, Pinterest and Instagram

Saturday, February 12, 2011

CHOCOLATE VALENTINE CAKES

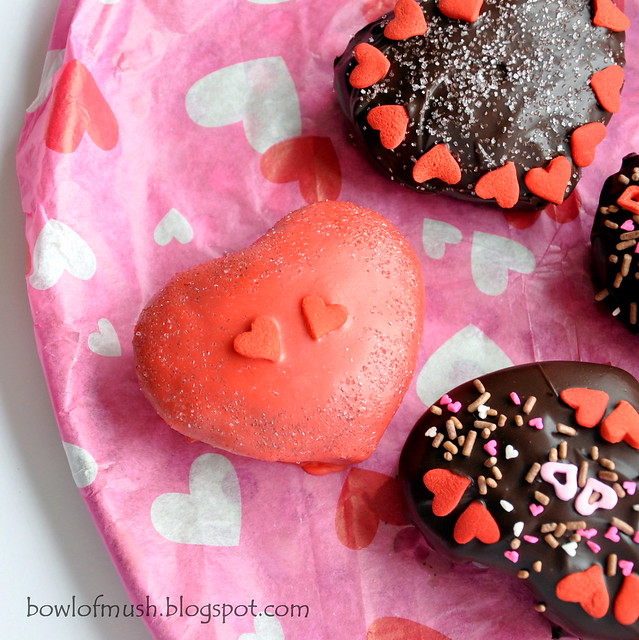
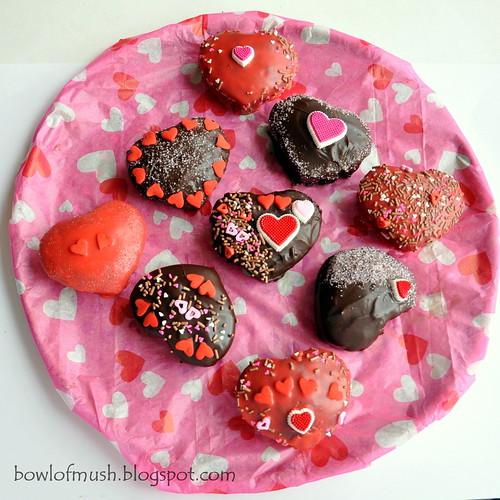
I love making a cake for Valentine's Day; its pretty much the only time of the year when everything can be red, pink and heart-shaped with a huge dose of lovey-doveyness. Last year's rose petal cake was so delicious and romantic that I actually thought about making it again this year. In the end though, I decided to not even make one big cake, but rather little cakes with lots of chocolate and some cute decorating.

The red cakes ganache is made with white chocolate and red food coloring and the others have a dark chocolate ganache.


Heart shaped chocolate cupcakes:

(makes 18-24)
  • 3/4 cup unsweetened cocoa powder
  • 1 1/2 cups all-purpose flour
  • 1 1/2 cups sugar
  • 1 1/2 teaspoons baking soda
  • 3/4 teaspoon baking powder
  • 3/4 teaspoon salt
  • 2 eggs
  • 3/4 cup lukewarm water
  • 3/4 cup buttermilk
  • 3 tablespoons pure coconut oil 
  • 1 teaspoon pure vanilla extract
Ganache icing:
  • 200g good dark chocolate or white chocolate
  • 1 cup of heavy cream
  • 1 tablespoon butter

Pre-heat oven to 350F.

Sift together all the dry ingredients in a large bowl.

Whisk in the eggs, lukewarm water, buttermilk, oil and vanilla until smooth.

Fill heart shaped cupcake liners 3/4 full with the batter (I used heart shaped silicone molds).

Bake for approx 20 minutes at 350F.

Allow to cool completely and then remove them from the liners and refrigerate while you make the ganache.

Chop all the chocolate up into very small pieces and put in a large bowl.

In a pot heat the heavy cream and butter until boiling.

Quickly pour the boiling cream over the chocolate and whisk until melted and smooth.

Put the cakes on a cooling rack with a baking pan underneath.

Immediately pour the ganache over the cakes and allow to drip down on a cooling rack.

Decorate as you like :)


   To see what else I'm up to, follow me on Twitter, Pinterest and Instagram

Monday, November 22, 2010

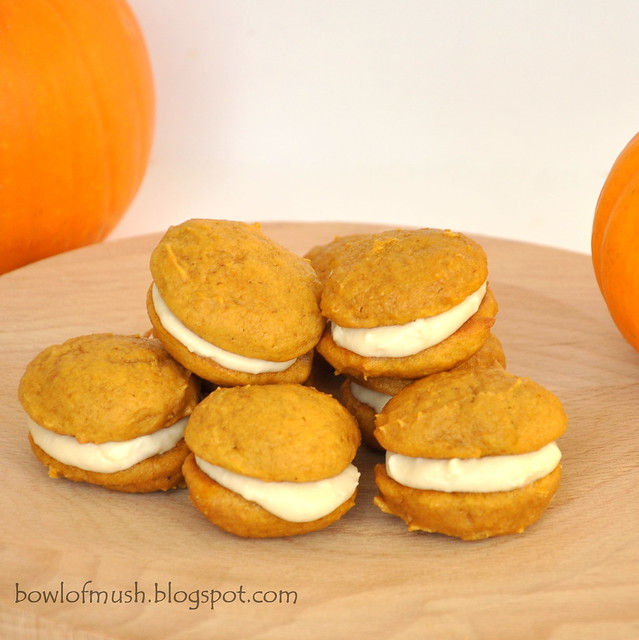
PUMPKIN WHOOPIE PIES


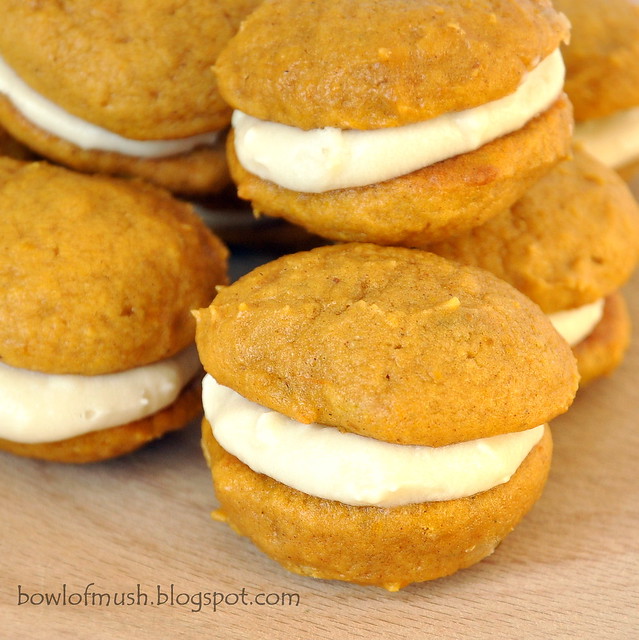
The first whoopie pies I ever made were red velvet last Christmas. What could be better than red velvet whoopie pies? Pumpkin ones! Everyone loves pumpkin this time of year. The maple cream cheese filling really completes the flavors of these delicate pumpkin delights. How could I resist not taking these to Thanksgiving this year?

I have only celebrated three Thanksgivings in my lifetime; being an American holiday, we don't celebrate it back home in the UK. Christmas is the only day we bring out the grand turkey, so it was a little disorientating for me the first time. It felt too much like Christmas. Thanksgiving definitely feels different to me now. The abundance of all things pumpkin is surely something that helps separate the holidays and sweet potatoes with marshmallows on top are not something you would find on the Christmas table. Thanksgiving has become an autumnal celebration of food that I just could not live without now.


Pumpkin Whoopie Pies:
(makes 36)

  • 3 cups all-purpose flour
  • 1 teaspoon baking powder
  • 1 teaspoon baking soda
  • 3/4 cup unsalted butter (softened)
  • 1 cup white sugar
  • 1/2 cup light brown sugar
  • 2 eggs
  • 1 and 1/2 cups pureed pumpkin
  • 1 teaspoon vanilla extract
  • 1 and 1/2 tablespoons ground cinnamon
  • 1 teaspoon ground ginger
  • 1/2 teaspoon ground nutmeg
  • 1/8th teaspoon ground cloves
  • 1/2 teaspoon salt
Maple Cream Cheese Filling:
  • 3 cups powdered sugar
  • 8 ounces cream cheese (room temp)
  • 5 tablespoons butter (softened)
  • 3 tablespoons maple syrup
  • 1 teaspoon vanilla extract
Preheat oven to 350F.

Cream together the butter and sugar well.


Whisk in the eggs, vanilla, salt and pumpkin.


Sift in the flour, baking powder, baking soda and spices.


Mix until well combined.


Scoop teaspoons of the batter on a parchment lined cookie sheet.


Bake for 10-15 minutes at 350F.


Allow to rest on a rack until completely cooled before assembling.


For the filling whisk all the ingredients together until very smooth.

Turn one cookie upside down and add a teaspoon of the frosting and add another cookie on top.


Continue until all your whoopie pies are assembled.


Wednesday, November 10, 2010

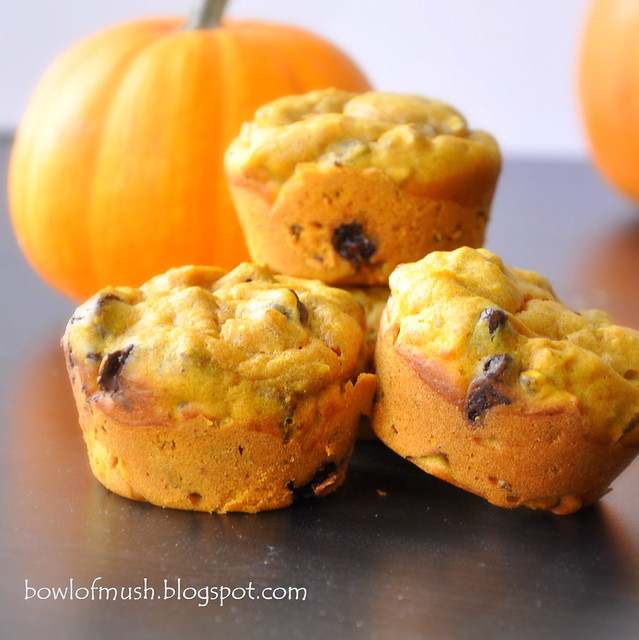
PUMPKIN, PECAN & CHOCOLATE CHIP MUFFINS


Happy Fall! I'm now Mrs. Bowl of Mush ;) Our wedding was everything I ever hoped it would be and the cake was SO delicious!

Now that I'm all settled down and there's no more crazy wedding plans to take care of I can finally get back to blogging! This is my favorite season for baking. It's a time for warm, comforting, Autumn flavors.


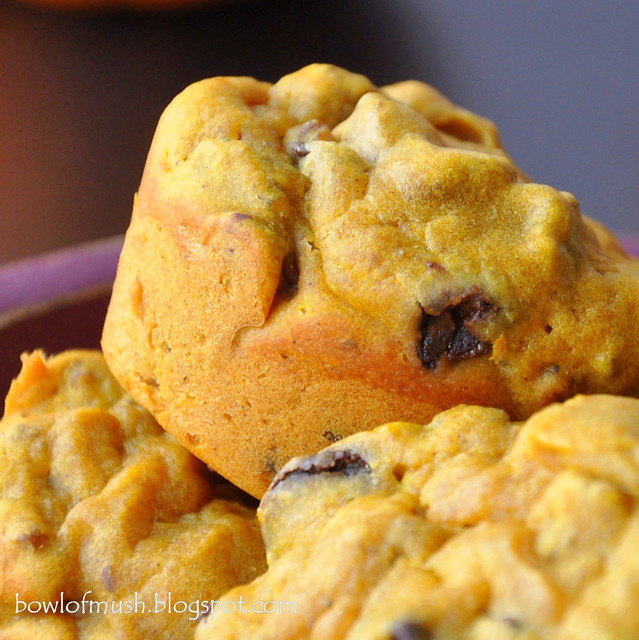
These muffins are so delicious and very fitting to the season. They smell incredible. Originally they started out as pumpkin pecan muffins but this time I added chocolate chips and I was in heaven.
Pumpkin, Pecan & Choc Chip Muffins:
(makes 12)

  • 2 cups flour
  • 1 1/2 tablespoons baking powder
  • 1/4 teaspoon baking soda
  • 1/4 teaspoon salt
  • 1 cup pumpkin puree
  • 1/2 cup vegetable oil (like canola)
  • 2 large eggs
  • 1/4 buttermilk
  • 1/2 cup sugar
  • 1/4 cup brown sugar
  • 1/2 teaspoon vanilla extract
  • 1/4 teaspoon ground nutmeg
  • 1/4 teaspoon ground ginger
  • 1/2 teaspoon ground cinnamon
  • pinch of ground cloves
  • 1/2 cup chopped pecans
  • 1/2 cup semi-sweet chocolate chips

Pre-heat oven to 350F.

Mix together the dry ingredients in a bowl. Set aside.

Mix together the wet ingredients and then add to the wet mixture.

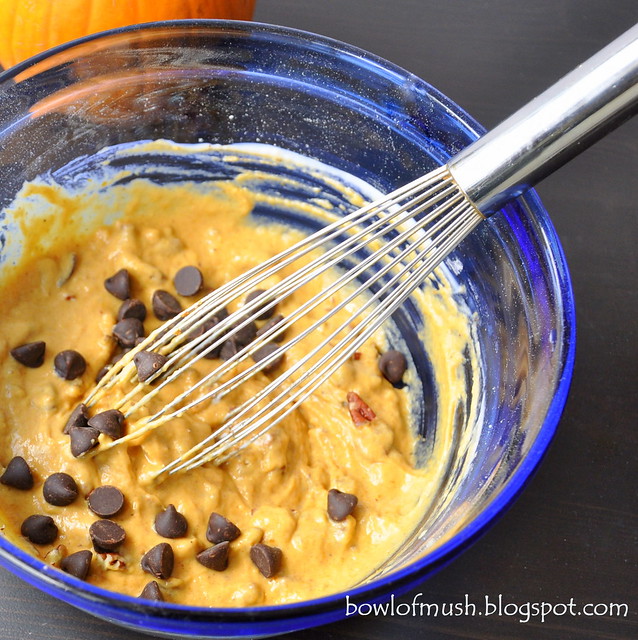
Add the chopped pecans and chocolate chips.

Be careful not to over mix the batter for a lighter muffin.

Bake at 350F for 25-30 mins.

Sunday, April 4, 2010

EASTER THUMBPRINT COOKIES


Happy Easter! I love everything about this time of year: the beautiful spring weather, the colors, the produce, birds chirping in the morning, my birthday :) It's the one time in the year that I actually appreciate the color yellow; there's nothing like the friendliness of bright yellow daffodils.
Pastel colors are a must right now; it really cheers you up after all those winter blues. I always stock up on plenty of Cadbury's Mini Eggs come spring, not only do I love eating them, but they make the cutest decorations on cakes and cookies for Easter. I actually prefer the UK version of the Mini Eggs, they are more purple in color and have spots and specks on them just like birds eggs, but I couldn't get a hold of them.
We used to get so many huge Easter eggs when I was a kid from everyone, it was always a competition between us all to see who got the most. The supermarkets are absolutely filled with so many different Easter eggs this time of year in the UK.

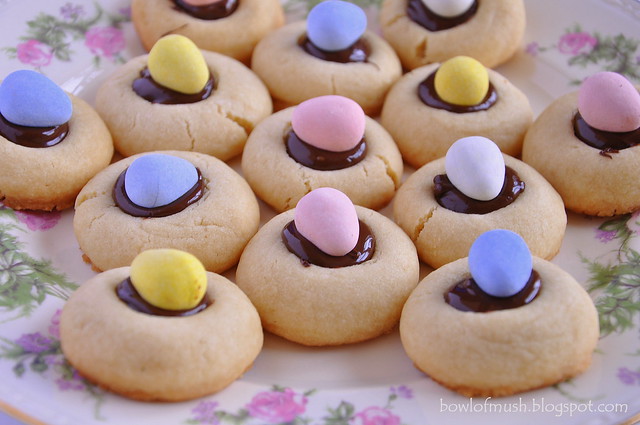
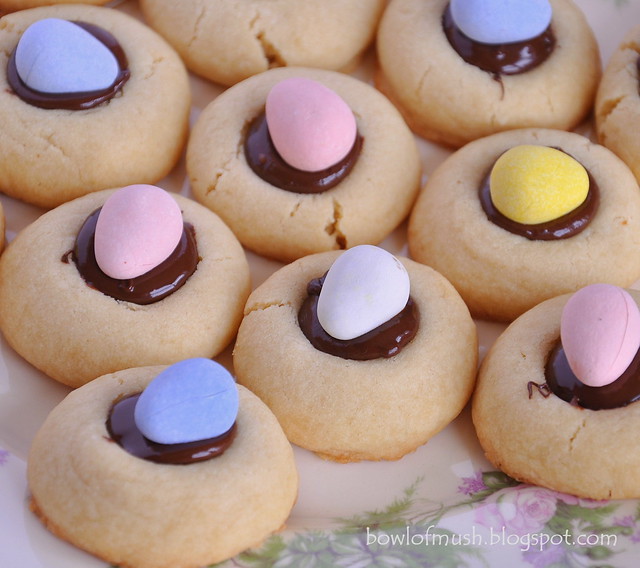
These thumbprint cookies are very delicate and light like shortbread. They are very small, you get about two bites out of them, but they're the perfect Easter/spring treat, especially with the little mini egg on top. 
Easter Thumbprint Cookies: 
(makes 24)
  • 10 tablespoons unsalted butter
  • 1/2 cup confectioners sugar
  • 1/4 teaspoon salt
  • 1 teaspoon vanilla extract
  • 1 1/4 cups all-purpose flour
  • 4 ounces semi-sweet chocolate (chopped)
  • 1 tablespoons butter
Preheat the oven to 350 F.

With an electric mixer, beat together the butter, sugar, vanilla and salt until smooth. Beat in the flour slowly until the dough has formed.
Roll teaspoonfuls of dough into balls. Place on an un-greased baking sheet and bake for 10 mins.

Then remove from the oven and press thumb prints into the center of the balls (I used the end of a utensil).

Place the tray back in the oven for a further 7-9 minutes or until lightly golden.

Allow the cookies to cool fully on a rack.

Melt the chocolate and butter in a double boiler until smooth.

Allow to cool slightly, then pour the chocolate into the cookies little thumbprints.

Add a chocolate mini egg on top for a cute Easter look.

Saturday, February 13, 2010

ROSE PETAL CAKE


What cake doesn't look pretty and romantic with rose petals scattered on top?

This cake has certainly brought out the mushy side in me this Valentine's weekend and it's all thanks to that "slight" obsession I have with anything flavored or scented with rose.

Over the winter holidays I was in London and brought some amazing things back with me, including the cocoa powder from Ladurée which I broke into in my last post. Fortnum and Mason is a place that never goes unvisited any time I'm in London. It was all taken for granted when I lived there but now it's a struggle limiting what I wish to purchase to what my suitcase can handle.

Along with countless tins of tea, another item I did manage to squeeze back was a gorgeous rose petal jelly preserve made from fresh rose petals. I've been desperate to use it in something other than spreading it on toast at any chance I get.

The preserve works perfectly in this cake. Its genuine rose flavor and delicate scent is very reminiscent to a Ladurée rose macaroon...can't complain about that!

White Cake: 
(makes 2 cake layers)
  • 1 cup milk 
  • 6 egg whites
  • 1 tsp vanilla extract
  • 2 1/4 cups cake flour
  • 1 3/4 cup sugar
  • 2 teaspoons baking powder
  • Pinch of teaspoon salt
  • 3/4 cup softened butter
Buttercream:
  • 1 cup unsalted, softened butter (2 sticks)
  • 4-5 cups confectioners sugar
  • 1/2 cup milk
  • 1/2 teaspoon vanilla extract
  • 2-3 teaspoons rose syrup
  • Rose petal Jam (for spreading between cake layers)

Pre-heat oven to 350F.

Grease two 9 inch cake pans, line with parchment paper, grease again and dust with flour.

Combine the milk, egg whites and vanilla extract in a bowl, mix with a fork and set aside.

In another bowl, combine the flour, sugar, baking powder and salt. Mix together well (I sift mine a few times for a very light cake).

Add the butter and either with your hands or a paddle mixer combine the mixture until you have a crumb like texture.

Add all but 1/2 cup of the milk/egg mixture to the flour mixture and whisk on a medium speed for 1 1/2 minutes.

Add the remaining 1/2 cup of the milk/egg mixture and beat again for 30 seconds.


Divide the batter equally between the two cake pans and smooth the tops. Bake for 30-35 minutes at 350F.

Let the cakes cool in their pans for 15 minutes before moving them onto racks to cool fully.

For the buttercream, add the softened butter to a large bowl and whisk until smooth.

Then add the milk, vanilla extract and slowly add the confectioners sugar, whisking to create a smooth cream

Add the rose syrup and whisk again (This will color the cream pink).

To start assembling the cake, cut each 9 inch cake in half horizontally.

Spread the rose petal jelly on top of the first layer and spread a thin layer of the buttercream on top.

Spread the jelly on the bottom of the next cake piece, add this to the first cake piece and then spread the jelly on top, as well as the buttercream.

Repeat the same directions for the next two cake pieces.

Once the cake is assembled, begin to spread the butter-cream over the whole cake to cover it completely.


Sprinkle the cake with pink and red rose petals :)


Wednesday, February 3, 2010

Chocolate Love Muffins

Happy (almost) Valentine's Day!


Whether you're making these for your loved one, friends or just for yourself, they are sure to make anyone's Valentine's Day sweet.


I have actually made these muffins a few times without any Hallmark excuse, but adding the dusted heart on top gave it the cute factor for this holiday.


While I was in London over the Christmas holidays, I made it over to
Ladurée in Piccadilly for some of those macaroons I've been craving all year. I also picked up a beautiful box of their cocoa powder and I finally got to use it for the first time in this recipe. Good quality cocoa powder really does make a world of difference.


Chocolate Chocolate-Chip Muffins (makes 12)
(Adapted from Feast by Nigella Lawson)
  • 1 3/4 cups all-purpose flour
  • 2 teaspoons baking powder
  • 1/2 teaspoon baking soda
  • 2 tablespoons unsweetened cocoa powder
  • 1 large egg
  • 1 cup milk
  • 1/3 cup + 2 teaspoons vegetable oil (I used melted butter)
  • 3/4 cup sugar
  • 1 teaspoon vanilla extract
  • 3/4 cup semisweet chocolate chips

My lovely Ladurée cocoa!


Preheat the oven to 400F.

Measure out all the dry ingredients into a large bowl.

In another bowl measure out all the liquid ingredients.

Add the liquid to the dry ingredients and mix together.

Mix in the chocolate chips.


Line a 12 hole muffin tin with paper cups.

Spoon the muffin batter evenly into each paper cup.

Bake in the oven at 400F for 20 minutes.

Allow the muffins to cool on a rack.

To create the hearts on top of the muffins, place a heart shaped stencil on top of a muffin and lightly dust with powdered sugar. Remove the stencil carefully and repeat with each muffin.


Tuesday, December 22, 2009

Venetian Rainbow Cookies


Another Italian tradition from my fiancé's family and a definite favorite of mine. My mother-in-law to be is pretty much the master of these little cookies and makes them every Christmas.

The cookies have been given many different names such as Venetians, Italian rainbow cookies, seven layer cookies, etc. I've always known them as Venetians.


There are three almond cake layers in the cookies, which are tri-colored: green, white and red to represent the Italian flag, although the red tends to be more pinkish. In between each layer is a spread of raspberry jam. Some recipes call for apricot jam, but I'm sticking with my mother-in-law's recipe as it never fails to amaze. The topping of chocolate really finishes these little cookies off beautifully and when they're all cut into little squares, you are left with the most perfect Christmas cookies. One bite of these and you will be hooked forever!


  • 1 can (8 ounces) Almond paste (I make my own, see recipe below)
  • 1 & 1/2 cups butter (3 sticks) softened
  • 1 cup granulated sugar
  • 4 eggs, separated
  • 1 teaspoon almond extract
  • 2 cups sifted all-purpose flour
  • 1/4 teaspoon salt
  • 10 drops green food coloring
  • 8 drops red food coloring
  • 1 jar (12 ounces) red raspberry preserves (seedless)
  • 2 squares of semisweet chocolate or use semisweet chocolate chips
Almond Paste: 
(makes enough for 2 batches of cookies)
  • 1/2 cup orange juice
  • 2 cups blanched almonds
  • 1 cup sugar
To make the almond paste, grind the almonds until you have a fine almond flour, add all three ingredients to a blender and blend until combined well and smooth. Store in the refrigerator in an air-tight tub.

Grease three 13/9/2 " pans and line with waxed paper and grease again.

In large bowl add the almond paste, butter, sugar, egg yolks, and almond extract.

Beat until fluffy with an electric mixer for 5 minutes.


Beat in the flour and salt.

Beat the egg whites with an electric mixer until stiff peaks form in a small bowl. 

Stir the egg whites into the almond mixture with a folding motion.


Remove 1-1/2 cups of batter and spread into the first prepared pan.

Remove another 1-1/2 cups of batter, add green food coloring and spread into the second pan.

Add red food coloring to the remainder of the batter and spread into the third pan.


Bake at 350F for 15 minutes, or just until edges are golden brown.

The cakes should be 1/4 inch thick.

Cool on wire racks.


Place the green layer on the back of a foil covered cookie sheet.

Heat the raspberry preserves (strain if there is seeds) and spread 1/2 of the warm preserves on the green layer.

Slide on the yellow layer and spread the reminder of the preserves on top.

Slide on the red layer and cover with plastic wrap.

Store in the fridge overnight with a weight on top. (such as a cutting board)

Melt the chocolate and spread a thin layer over the top.


Allow to dry for 30 minutes and then cut into 1" square pieces.


Related Posts Plugin for WordPress, Blogger...